amoebae
N3
   previously: catabuca
Posts: 932 Likes: 3,579
inherit
2526
0
3,579
amoebae
previously: catabuca
932
January 2017
amoebae
|
Post by amoebae on Apr 20, 2017 22:52:03 GMT
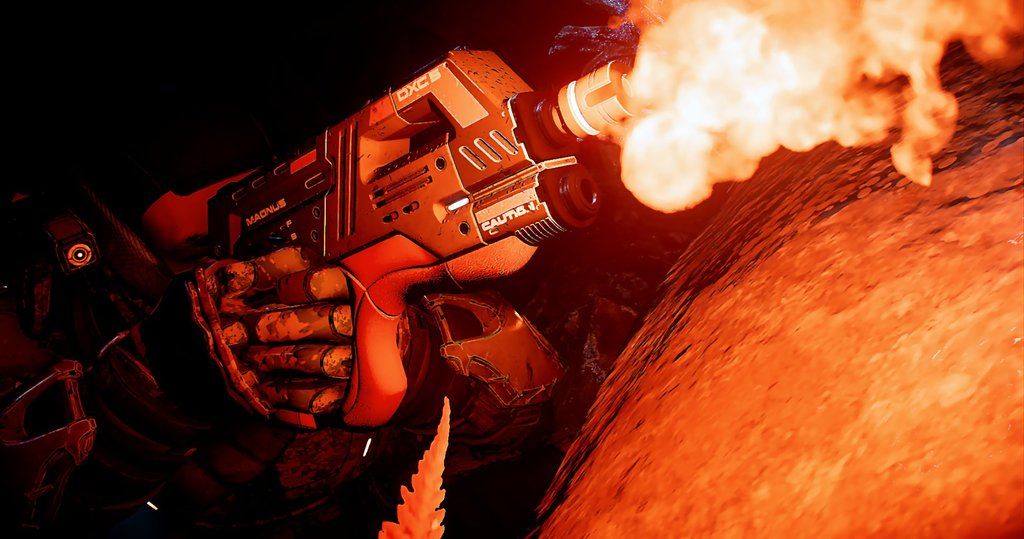
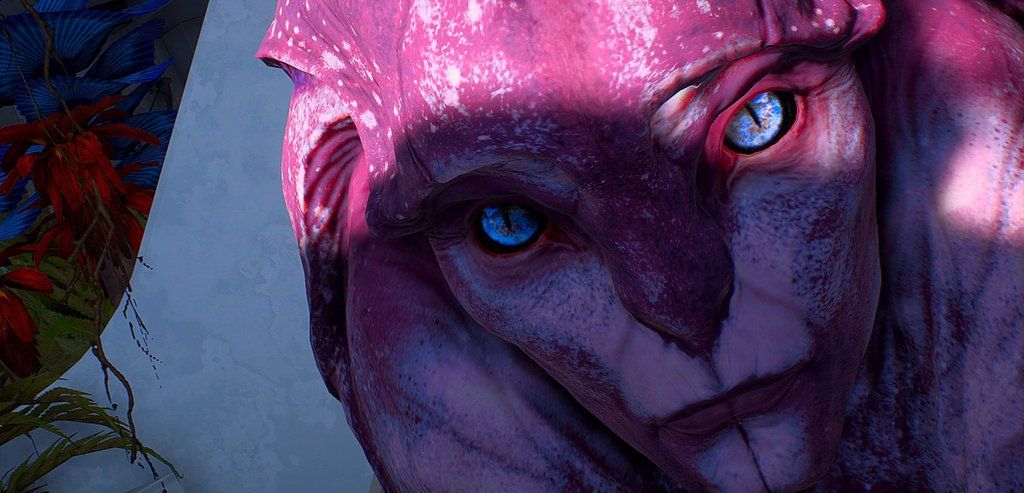
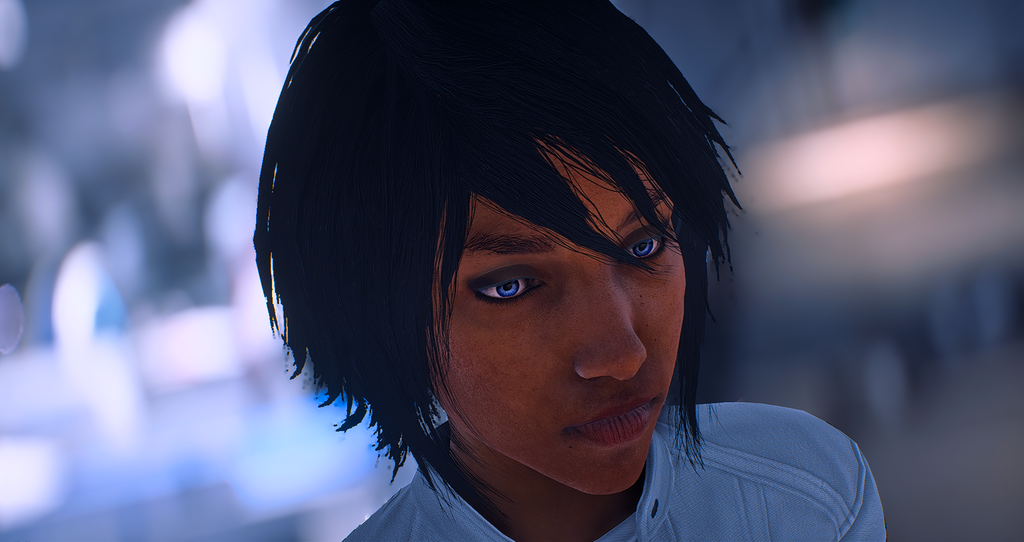
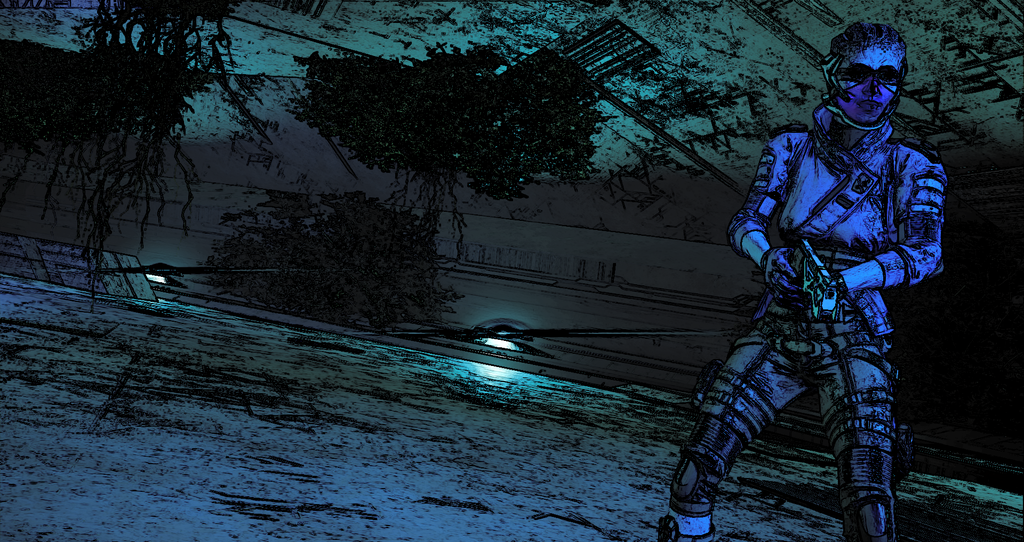
If you're interested, here are my dof settings in 2.0.3 for the above shot. Note: this is at 5k resolution, for 1440p reduce the blur to ~250 for the same effect. #define USE_DEPTHOFFIELD 1 //[DOF] //-
//>Global Parameters<\\
#define DOF_METHOD 4 //[1:5] //-1: Ring DOF(Petka/martinsh) 2: Magic DOF 3: GP65CJ042 DOF 4: Matso DOF 5: Marty McFly Advanced DOF
#define DOF_AUTOFOCUS 0 //[0:1] //-Enables automated focus recognition based on samples around autofocus center.
#define DOF_MOUSEDRIVEN_AF 0 //[0:1] //-Enables mouse driven auto-focus. If 1 the AF focus point is read from the mouse coordinates, otherwise the DOF_FOCUSPOINT is used.
#define DOF_FOCUSPOINT float2(0.5,0.3) //[0.0:1.0] //-X and Y coordinates of autofocus center. Axes start from upper left screen corner.
#define DOF_FOCUSSAMPLES 10 //[3:10] //-Amount of samples around the focus point for smoother focal plane detection.
#define DOF_FOCUSRADIUS 0.05 //[0.02:0.20] //-Radius of samples around the focus point.
#define DOF_NEARBLURCURVE 30.15 //[0.50:1000.00] //-Curve of blur closer than focal plane. Higher means less blur.
#define DOF_FARBLURCURVE 0.3 //[0.05:5.00] //-Curve of blur behind focal plane. Higher means less blur.
#define DOF_MANUALFOCUSDEPTH 0.072 //[0.00:1.00] //-Depth of focal plane when autofocus is off. 0.0 means camera, 1.0 means infinite distance.
#define DOF_INFINITEFOCUS 1.00 //[0.01:1.00] //-Distance at which depth is considered as infinite. 1.0 is standard. Low values only produce out of focus blur when focus object is very close to the camera. Recommended for gaming.
#define DOF_BLURRADIUS 800.0 //[2.0:100.0] //-Maximal blur radius in pixels.
#define DOF_RENDERRESMULT 1.0 //[0.5:1.0] //-Scaling factor
//>MATSO DOF Settings<\\
#define bMatsoDOFChromaEnable 1 //[0:1] //-Enables Chromatic Abberation.
#define bMatsoDOFBokehEnable 1 //[0:1] //-Enables Bokeh weighting do define bright light spots and increase bokeh shape definiton.
#define fMatsoDOFChromaPow 9.0 //[0.2:3.0] //-Amount of chromatic abberation color shifting.
#define fMatsoDOFBokehCurve 32.0 //[0.5:20.0] //-Bokeh curve.
#define fMatsoDOFBokehLight 0.004 //[0.000:2.000] //-Bokeh brightening factor.
#define iMatsoDOFBokehQuality 7 //[1:10] //-Blur quality as control value over tap count.
#define fMatsoDOFBokehAngle 180 //[0:360] //-Rotation angle of bokeh shape. 90/270 diagonalMatso's dof can yield a lot of fun results. Changing the bokeh angle to 90 or 270 makes it diagonal, although for that you should also change bokeh quality to 20 (you can go higher too). Play around with chroma power and bokeh curve until you get the look you want. Remember the strength of the blur (blur radius) will reduce the higher your resolution, so if you're playing in 1080p and hotsampling to 4k, start by doubling the blur strength before hotsampling. You might need to take a few shots until you get it right, increasing or reducing the blur strength. Note I'm using manual focus. It's the best way to get the precise effects you're looking for with this technique. |
|
amoebae
N3
   previously: catabuca
Posts: 932 Likes: 3,579
inherit
2526
0
3,579
amoebae
previously: catabuca
932
January 2017
amoebae
|
Post by amoebae on Apr 20, 2017 22:56:07 GMT
And although it didn't have a huge effect on the finished picture, I also used the Cartoon shader (It contributed to some of the more watercoloury aspects of the picture).
Here are my settings for this shot:
////-----------//
///**CARTOON**///
//-----------////
#define USE_CARTOON 1 //[Cartoon] //-Cartoon : "Toon"s the image.

//>Cartoon settings<\\
#define CartoonPower 1.0 //[0.1:10.0] //-Amount of effect you want.
#define CartoonEdgeSlope 0.5 //[0.1:8.0] //-Raise this to filter out fainter edges. You might need to increase the power to compensate. Whole numbers are faster.
|
|
SilverSie
N1
 lost in andromeda
 Games: Mass Effect Trilogy, Dragon Age: Origins, Dragon Age 2, Dragon Age Inquisition, Mass Effect Andromeda
Origin: SilverSie
Posts:
 27 Likes: 98
inherit
7070
0
98
SilverSie
lost in andromeda
27
April 2017
silversie
Mass Effect Trilogy, Dragon Age: Origins, Dragon Age 2, Dragon Age Inquisition, Mass Effect Andromeda
SilverSie
|
Post by SilverSie on Apr 20, 2017 23:01:19 GMT
If you're interested, here are my dof settings in 2.0.3 for the above shot. Note: this is at 5k resolution, for 1440p reduce the blur to ~250 for the same effect. #define USE_DEPTHOFFIELD 1 //[DOF] //-
//>Global Parameters<\\
#define DOF_METHOD 4 //[1:5] //-1: Ring DOF(Petka/martinsh) 2: Magic DOF 3: GP65CJ042 DOF 4: Matso DOF 5: Marty McFly Advanced DOF
#define DOF_AUTOFOCUS 0 //[0:1] //-Enables automated focus recognition based on samples around autofocus center.
#define DOF_MOUSEDRIVEN_AF 0 //[0:1] //-Enables mouse driven auto-focus. If 1 the AF focus point is read from the mouse coordinates, otherwise the DOF_FOCUSPOINT is used.
#define DOF_FOCUSPOINT float2(0.5,0.3) //[0.0:1.0] //-X and Y coordinates of autofocus center. Axes start from upper left screen corner.
#define DOF_FOCUSSAMPLES 10 //[3:10] //-Amount of samples around the focus point for smoother focal plane detection.
#define DOF_FOCUSRADIUS 0.05 //[0.02:0.20] //-Radius of samples around the focus point.
#define DOF_NEARBLURCURVE 30.15 //[0.50:1000.00] //-Curve of blur closer than focal plane. Higher means less blur.
#define DOF_FARBLURCURVE 0.3 //[0.05:5.00] //-Curve of blur behind focal plane. Higher means less blur.
#define DOF_MANUALFOCUSDEPTH 0.072 //[0.00:1.00] //-Depth of focal plane when autofocus is off. 0.0 means camera, 1.0 means infinite distance.
#define DOF_INFINITEFOCUS 1.00 //[0.01:1.00] //-Distance at which depth is considered as infinite. 1.0 is standard. Low values only produce out of focus blur when focus object is very close to the camera. Recommended for gaming.
#define DOF_BLURRADIUS 800.0 //[2.0:100.0] //-Maximal blur radius in pixels.
#define DOF_RENDERRESMULT 1.0 //[0.5:1.0] //-Scaling factor
//>MATSO DOF Settings<\\
#define bMatsoDOFChromaEnable 1 //[0:1] //-Enables Chromatic Abberation.
#define bMatsoDOFBokehEnable 1 //[0:1] //-Enables Bokeh weighting do define bright light spots and increase bokeh shape definiton.
#define fMatsoDOFChromaPow 9.0 //[0.2:3.0] //-Amount of chromatic abberation color shifting.
#define fMatsoDOFBokehCurve 32.0 //[0.5:20.0] //-Bokeh curve.
#define fMatsoDOFBokehLight 0.004 //[0.000:2.000] //-Bokeh brightening factor.
#define iMatsoDOFBokehQuality 7 //[1:10] //-Blur quality as control value over tap count.
#define fMatsoDOFBokehAngle 180 //[0:360] //-Rotation angle of bokeh shape. 90/270 diagonalMatso's dof can yield a lot of fun results. Changing the bokeh angle to 90 or 270 makes it diagonal, although for that you should also change bokeh quality to 20 (you can go higher too). Play around with chroma power and bokeh curve until you get the look you want. Remember the strength of the blur (blur radius) will reduce the higher your resolution, so if you're playing in 1080p and hotsampling to 4k, start by doubling the blur strength before hotsampling. You might need to take a few shots until you get it right, increasing or reducing the blur strength. Note I'm using manual focus. It's the best way to get the precise effects you're looking for with this technique. This is a big help, thank you! Really excited to try this out. |
|
amoebae
N3
   previously: catabuca
Posts: 932 Likes: 3,579
inherit
2526
0
3,579
amoebae
previously: catabuca
932
January 2017
amoebae
|
Post by amoebae on Apr 20, 2017 23:06:46 GMT
It's a lot of fun to play with.
The thing you'll be most annoyed by is getting the manual focus depth right. You can sometimes need to use up to 4 decimal places to inch it closer to or farther away from the camera.
To find the focus plane (manualfocusdepth) I recommend setting both near and far blur curve quite low to begin with (say 0.8 each), and the blur radius quite high. Then change the manual focus depth bit by bit until you see something that is in focus. If your subject is close to the camera, start with a value ~0.1 and gradually drop it lower. You can see how close I was in this shot, and I ended up with depth at 0.072. 0.071 was too close - it can be that sensitive.
Then you can move near and far blur as needed. I turned up the value for near blur curve because I didn't want any near blur in this shot. Far blur curve is quite low because I wanted the blur to start slightly at the back of Ryder so some parts of the back of her were blurred.
It's a delicate balancing act but once you've found the focal plane once you realise how to find it quickly and easily again next time.
|
|
ashoken
N2
  "I didn't come here to be a goddamn outsider!"
 Games: Mass Effect Trilogy, Dragon Age: Origins, Dragon Age 2, Dragon Age Inquisition, KOTOR, Baldur's Gate, Neverwinter Nights, Jade Empire, Mass Effect Andromeda
Posts:
 160 Likes: 795
inherit
1149
0
795
ashoken
"I didn't come here to be a goddamn outsider!"
160
Aug 23, 2016 12:14:38 GMT
August 2016
ashoken
Mass Effect Trilogy, Dragon Age: Origins, Dragon Age 2, Dragon Age Inquisition, KOTOR, Baldur's Gate, Neverwinter Nights, Jade Empire, Mass Effect Andromeda
|
Post by ashoken on Apr 21, 2017 1:50:01 GMT
I haven't had a lot of time to do much in way of screen shots, but here are a couple first attempts.   Save Save |
|
amoebae
N3
   previously: catabuca
Posts: 932 Likes: 3,579
inherit
2526
0
3,579
amoebae
previously: catabuca
932
January 2017
amoebae
|
Post by amoebae on Apr 21, 2017 14:08:34 GMT
More using the effects above:   |
|
amoebae
N3
   previously: catabuca
Posts: 932 Likes: 3,579
inherit
2526
0
3,579
amoebae
previously: catabuca
932
January 2017
amoebae
|
Post by amoebae on Apr 21, 2017 18:18:15 GMT
A point about the effects above, or any effect you're messing around with really - don't just slap an effect on any old shot and think it'll make a shit shot a good shot. It won't. I don't always get it right myself, but try to think about whether the effect compliments the picture. Think about the composition and how the foreground and background interact with the subject and with the effect itself. Similar to the earlier discussion on dof blur - these effects aren't just to cover up a bad picture. It'll be painfully obvious if no thought went into composition and all the elements in the scene.
I took countless versions of these shots that weren't quite right. They're all in the recycling bin now. And I took loads of others with different compositions, different backgrounds, different poses, and none of them will see the light of day despite the pretty colours and cool splodgy effects, because the rest of the picture is uninspiring as hell.
I mean, have fun with it. That's the point, right? But challenge yourself to get better, and think about how it all comes together. You should sit and think a moment about whether you're taking a picture of an effect, or taking a picture that uses a specific effect to compliment it. There's a difference. At least for this thread.
|
|
ashoken
N2
  "I didn't come here to be a goddamn outsider!"
 Games: Mass Effect Trilogy, Dragon Age: Origins, Dragon Age 2, Dragon Age Inquisition, KOTOR, Baldur's Gate, Neverwinter Nights, Jade Empire, Mass Effect Andromeda
Posts:
 160 Likes: 795
inherit
1149
0
795
ashoken
"I didn't come here to be a goddamn outsider!"
160
Aug 23, 2016 12:14:38 GMT
August 2016
ashoken
Mass Effect Trilogy, Dragon Age: Origins, Dragon Age 2, Dragon Age Inquisition, KOTOR, Baldur's Gate, Neverwinter Nights, Jade Empire, Mass Effect Andromeda
|
Post by ashoken on Apr 21, 2017 21:46:25 GMT
It's a beautiful effect.  |
|
inherit
6963
0
Aug 24, 2017 18:28:15 GMT
65
bossuary
32
April 2017
bossuary
|
Post by bossuary on Apr 22, 2017 1:48:06 GMT
hey, hey. look who fumbled into ReShade today. . .   |
|
inherit
6963
0
Aug 24, 2017 18:28:15 GMT
65
bossuary
32
April 2017
bossuary
|
Post by bossuary on Apr 22, 2017 1:55:14 GMT
the problem is. . .i have almost no clue what i actually changed/tweaked. without seeing the effects happen until i close the notepad, i'm just fiddling with numbers i don't understand.  i feel like eye contact with the camera makes things so much more dynamic. especially with a character that has virtually no range of idle animation. |
|
inherit
6963
0
Aug 24, 2017 18:28:15 GMT
65
bossuary
32
April 2017
bossuary
|
Post by bossuary on Apr 22, 2017 2:06:31 GMT
what i learned from today's foray into ReShade is that i need to spend some time figuring out what each of the effects in all their folders actually DO. i found myself scrolling and scrolling, blindly trying things out. which is fun for exactly five minutes before it becomes tedious. i may ditch ReShade 1.0.7 in favor of the newer version. if i understand, 3.0 has a dialogue box with sliders? way more my speed. (incidentally, i had it working the whole time. . .i just didn't realize that i had to physically navigate to the ReShade folder to open the shader files. for some reason i assumed ReShade would magically make itself known, like Cinematic Tools). sigh. maybe i'm just getting old, but this business of tracking down simple things like curves, gamma, white-point, etc. in a bunch of separate notepad windows is possibly too fiddly for me. or i need someone to tell me "Here's a list of all the shaders you will never use and can safely dump." AND i managed to ruin a perfectly lovely shot of Liam by not realizing that the ReShade message was up in the lefthand corner.  |
|
ashoken
N2
  "I didn't come here to be a goddamn outsider!"
 Games: Mass Effect Trilogy, Dragon Age: Origins, Dragon Age 2, Dragon Age Inquisition, KOTOR, Baldur's Gate, Neverwinter Nights, Jade Empire, Mass Effect Andromeda
Posts:
 160 Likes: 795
inherit
1149
0
795
ashoken
"I didn't come here to be a goddamn outsider!"
160
Aug 23, 2016 12:14:38 GMT
August 2016
ashoken
Mass Effect Trilogy, Dragon Age: Origins, Dragon Age 2, Dragon Age Inquisition, KOTOR, Baldur's Gate, Neverwinter Nights, Jade Empire, Mass Effect Andromeda
|
Post by ashoken on Apr 22, 2017 4:07:33 GMT
Still reacquainting myself with the tools, so I created a new sisRyder to do that with. I suspect her play through will be ages until completion.   Edit: posted wrong screenshot so I fixed that.  Save Save |
|
SilverSie
N1
 lost in andromeda
 Games: Mass Effect Trilogy, Dragon Age: Origins, Dragon Age 2, Dragon Age Inquisition, Mass Effect Andromeda
Origin: SilverSie
Posts:
 27 Likes: 98
inherit
7070
0
98
SilverSie
lost in andromeda
27
April 2017
silversie
Mass Effect Trilogy, Dragon Age: Origins, Dragon Age 2, Dragon Age Inquisition, Mass Effect Andromeda
SilverSie
|
Post by SilverSie on Apr 22, 2017 13:49:38 GMT
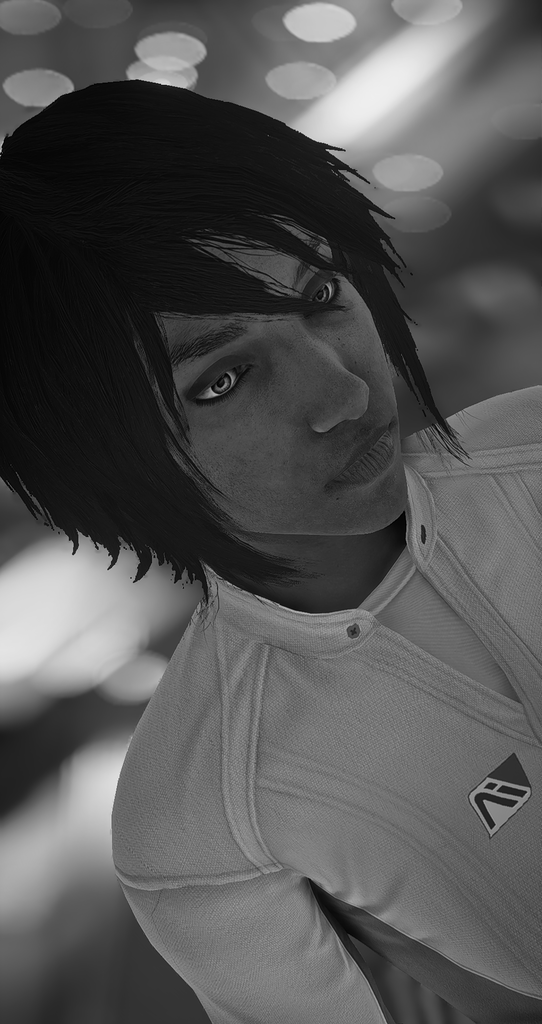
Started diving more into Reshade myself-- upgraded to 2.0 and used amoeba's Eos preset as a base.  There was something I really liked about the highlights on Jaal's face here-- I should've tried for a b&w portrait shot as well "First Contact"  Bonus: |
|
inherit
3318
0
3,812
Psychevore
1,584
February 2017
psychevore
Mass Effect Trilogy, Dragon Age: Origins, Baldur's Gate, Neverwinter Nights, Mass Effect Andromeda, Mass Effect Legendary Edition
|
Post by Psychevore on Apr 22, 2017 14:22:15 GMT
Quick question: are all these shots taken on a PC? I'm on a PS4 pro. Are those screenshots any good to work with? Also realise this might be a stupid question, but I know nothing of image editing  |
|
amoebae
N3
   previously: catabuca
Posts: 932 Likes: 3,579
inherit
2526
0
3,579
amoebae
previously: catabuca
932
January 2017
amoebae
|
Post by amoebae on Apr 22, 2017 16:21:49 GMT
Quick question: are all these shots taken on a PC? I'm on a PS4 pro. Are those screenshots any good to work with? Also realise this might be a stupid question, but I know nothing of image editing  Yep, these are all on PC. Unless PS4 has its own photo mode (like Horizon: Zero Dawn for example) it's not really going to be possible to get shots like these - mostly because you can't activate any kind of freecam. I wish more developers would integrate a really good photo mode into their games. Oftentimes player screenshots help market the game for them. |
|
amoebae
N3
   previously: catabuca
Posts: 932 Likes: 3,579
inherit
2526
0
3,579
amoebae
previously: catabuca
932
January 2017
amoebae
|
Post by amoebae on Apr 22, 2017 17:32:36 GMT
what i learned from today's foray into ReShade is that i need to spend some time figuring out what each of the effects in all their folders actually DO. i found myself scrolling and scrolling, blindly trying things out. which is fun for exactly five minutes before it becomes tedious. i may ditch ReShade 1.0.7 in favor of the newer version. if i understand, 3.0 has a dialogue box with sliders? way more my speed. (incidentally, i had it working the whole time. . .i just didn't realize that i had to physically navigate to the ReShade folder to open the shader files. for some reason i assumed ReShade would magically make itself known, like Cinematic Tools). sigh. maybe i'm just getting old, but this business of tracking down simple things like curves, gamma, white-point, etc. in a bunch of separate notepad windows is possibly too fiddly for me. or i need someone to tell me "Here's a list of all the shaders you will never use and can safely dump." AND i managed to ruin a perfectly lovely shot of Liam by not realizing that the ReShade message was up in the lefthand corner.  It's not an age thing. I'm 39 and I love it. It's just a tolerance thing. A "what do you enjoy doing" thing. If you don't enjoy it, that's fine, there will always be other people's presets you can use. That's what the majority of people do. Learning how to tweak things though will always give you the best results for your screenshots, just like knowing how to edit a raw camera image rather than just applying a stock ico profile. I'm about to post a mini shaders tutorial below (in a separate post). It's just a jumble of thoughts and tips, but it might help a little. |
|
amoebae
N3
   previously: catabuca
Posts: 932 Likes: 3,579
inherit
2526
0
3,579
amoebae
previously: catabuca
932
January 2017
amoebae
|
Post by amoebae on Apr 22, 2017 18:12:06 GMT
Mini ReShade Shaders TutorialLearning to create your own ReShade presets does, unfortunately (or fortunately for me, because I enjoy doing it), mean spending a lot of time turning different effects on and off and cranking their values up and down to see what they do. Once you've worked out what the key shaders do, though, you'll be able to go to them quickly in the future. A good way of doing it is using someone else's preset and looking at what shaders it uses, and turning individual ones off and on again, to see what changes. Here is my current preset for Elaaden. (You can see some of my Elaaden screenshots in this album on flickr.) Feel free to use it, abuse it, take it apart, put it back together, tweak it, change it, whatever. I've included all the files necessary, so just unzip and drop in your game folder (removing old ones first). Note: Usually we can distribute the binary (dll) and cfg files, but .h or .fx files (the actual shaders) are off limits and must be downloaded from their authors or ReShade's website/github/during installation. Since 2.0.3 isn't widely available anymore I've just put everything together here. I don't recommend doing that and abusing the shader creators' good will, but I got permission for one of my TS4 presets and I'm cheekily extending it here because I'm a terrible person. There's a link on the first page of this thread and at the bottom of this post to the repository of old versions. If you're sharing your presets I recommend linking users to that repository to download the files they need, and just including the cfg files from your preset to paste over the top.
A lot of presets tend to use some of the same shaders over and over. You don't have to use all at once, some do similar things but in different ways, but you can use them all together if you want to slowly build up just the right look. The more shaders you turn on, the higher the overhead on your PC's performance. Some common shaders, which are all found in CeeJay's cfg file if using 2.0.x: - Levels
- Curves
- HDR
- LiftGammaGain
- Tonemapping
- Vibrance
- SMAA
- Lumasharpen
The above shaders were once included in SweetFX, and they do a lot of the heavy lifting for most presets. They are by no means mandatory to use, but they are each very useful. Levels: does what you expect it to do - you can adjust what ReShade treats as the white and black point. Curves: similar results to levels but with less control, but at the same time can be used to curve colours as well as light. Has several curve algorithms to choose from. HDR: affects colours and light, this is your brightness and contrast in one. Can be fiddly to get both values working together, but it's great once you do. This is the only value I'm generally tweaking for brightness on a shot-by-shot basis with my current preset. LiftGammaGain: very powerful colour and contrast tool, allowing you to change the gamma of RGB channels independently for shadows, midtones, and highlights. I do a lot of my initial colour tweaks with this shader, and then often come back and tweak it for finer changes once I've done other things. Tonemapping: contains several effects - gamma, exposure, saturation, bleach, and defog. Defog is another colour correction tool - the others do what you'd expect. Vibrance: does what it says on the tin. Can be fiddly with negative values. Can be used for colour correction as well as just general vibrance. SMAA: this is anti-aliasing, probably the best post-process anti-aliasing you can get. Better than FXAA (which is in most games). PP AA applies to the image after it is rendered, which often means it blurs the image and can't distinguish between different types of edges. SMAA keeps blurring to an absolute minimum, and is capable of really quite powerful AA. You could probably ditch ME:A's own AA and replace it with this for a more lightweight alternative without seeing a really huge loss in quality, especially if you're hotsampling - which will remove jaggies on its own. Lumasharpen: sharpens the image, but will introduce more aliasing the higher you go. Avoid over-sharpening, it rarely looks good. Elsewhere in ReShade, a really great colour correction shader is HSV. It's not included in 3.0.x (I found a randomly ported version in a thread somewhere on the ReShade forum, but it hasn't made it in officially yet.) In 2.0.x you can find it in MartyMcFly's cfg file. I'm not using this in my ME:A presets currently, but I've used it extensively in my TS4 presets. Bloom is always fun to play with, although it can be tricky to get under control. It can be used for light and/or for colour correction. There are a couple of different bloom shaders. The one I generally use is just called Bloom inside Ganossa's cfg in 2.0.x. Ioxa's Gaussian Bloom is very powerful as well, and works noticeably differently to Ganossa's. There is a very basic bloom shader inside CeeJay's cfg (the old SweetFX bloom), but I don't use that because of its lack of controls. Ambient Light (Ganossa) can be a lot of fun. It has its own adaptation controls (which might help mitigate some of ME:A's truly ridiculous adaptation - I haven't experimented), but is also another type of bloom in some ways. It can be quite heavy-handed, and it's a very slow shader to load, but can be nice situationally and add a lot of atmosphere. Ambient Occlusion shaders will give you more options for shadowing, which can produce some really nice effects. In my current presets I'm using SSGI solely for its GI (global illumination), since I use HBAO Full in-game and haven't really felt the need for further AO. Most common to use in other games is SSAO, which is relatively lightweight (compared to HBAO for example) and has a good range of options. 3.0.x has MXAO, which is another great option (but won't work properly in ME:A). Depth of Field has several shaders which offer different options. The best imo are Matso (what I used for the funky effects above) and ADOF/Marty McFly's. I have ADOF set up to mimic the bokeh shapes in ME:A, so I can use it as a substitute on the Tempest, where the Cinematic Tools' DoF doesn't work. Both Ambient Occlusion and Depth of Field require a game to have access to the depth buffer. Not all games allow ReShade this access. ME:A does, but only when using 1.x.x and 2.0.x. 3.0.x sort of works but doesn't - it's very buggy. ME:A has a reversed depth buffer, which you need to tell ReShade about. 2.0.x makes it easy with a setting in Global.cfg. One shader you might find ridiculously useful is LUT. There are two versions of this. I recommend using the one under Ganossa's cfg, under the Tuning Palette options. In case you haven't worked with LUTs before, LUT stands for Look-Up Table, and is used a great deal in cinematography to colour grade. The way it works in ReShade is you can take a bunch of vanilla screenshots of the game, and take them into Photoshop or similar and edit them using layers until you have something you like and that works across all situations. Then you open a neutral LUT and apply the same settings to it and save. Then point ReShade to that LUT, and it will effectively give your whole game the same settings you applied in Photoshop. Things like vignettes and grain and any selective area touch-ups won't work - this is all about colours and contrast that apply to the image as a whole. Here is a tutorial I made for TS4 players: From Photoshop to ReShade. I keep meaning to do this for ME:A, but have been too lazy to take all those vanilla screenshots ^^
Tip: You can use negative values with most things, and you can use values outside of the range that is specified in the instructions for most as well. Some of the best effects can be had by playing around with numbers you wouldn't expect. I almost always use Levels with numbers outside their specified ranges. Using negative values for Bloom's RGB controls turns it into CMY controls as you'd probably expect. Tip: even if you don't use SRWE, if you're adjusting a ReShade preset set the game to windowed mode. That way when you tab out you can still see the game running behind Notepad++ (or whatever you use), and as soon as you save your changes the game will update. You don't need to tab back in to see the changes, you can see them behind Notepad++.
VersionsMost previous versions of ReShade are available here in a user-maintained repository. This repository has already changed locations at least once, and there is no guarantee these will be available in the future, so I recommend downloading all the versions you might need and storing them somewhere safe for future use. The most up-to-date version of ReShade is always available to download from the ReShade homepage, and by following links on there you can find the github project. ReShade the tool is now open-source. Individual shaders are created, maintained and owned by their respective authors. 3.0.x comes with its own in-game GUI for editing shaders. Some find this easier to deal with, although it's not the best designed GUI out there and comes with its own frustrations. The file structure is entirely different in 3.0.x, and using the GUI seems to be the easiest way to edit rather than using Notepad++. Installation of 3.0.x is easy enough, although collecting together all the shaders you want to use with it can be awkward since there are quite a few useful and interesting ones not yet included on github, but scattered around the ReShade forum and elsewhere. Some shaders that lots of people enjoyed from earlier versions haven't been ported to 3.0.x as of yet. 2.0.x is probably best installed manually to avoid any frustrations with the assistant, but that's down to personal preference. The assistant can be used for editing, but most people I've seen don't find it an enjoyable experience. The best way to edit shaders is with Notepad++ or similar. (I recommend Notepad++ because it numbers lines, groups elements together with visual cues, and you can click next to a line to add a blue circle to the line to make it easy to find when you scroll down again later. Notepad++ is free.) Editing manually in this way also gives you greater control over the value increments, and lets you easily go outside of the specified range (which is where the magic happens). It might be daunting at first, but quite a few preset makers still prefer this way of editing. Of course, it's personal preference. Use whatever makes sense to you. 1.1.0 is still widely used by many. It doesn't quite have the functionality of 2.0.x, but is still fairly robust. Instead of the assistant, there is the mediator. Again, opinions vary on whether it's a good tool or not. Manual installation is still probably the best way to go, with manual editing of shaders via Notepad++, but that's up to you. I still use 2.0.3 frequently, although tend to use 3.0.x with new games (unless it doesn't work as well, like in ME:A). The only way to decide which you prefer is to spend a good deal of time with each of them. There are no shortcuts to using ReShade if you want to create your own presets, but it's not nearly as complicated and complex as it can appear when you're starting out. Basically, if you have a keyboard with the keys 0-9 and can type those numbers you can create your own ReShade presets.
|
|
amoebae
N3
   previously: catabuca
Posts: 932 Likes: 3,579
inherit
2526
0
3,579
amoebae
previously: catabuca
932
January 2017
amoebae
|
Post by amoebae on Apr 23, 2017 4:06:34 GMT
Amazing what you can do with ReShade.   |
|
SilverSie
N1
 lost in andromeda
 Games: Mass Effect Trilogy, Dragon Age: Origins, Dragon Age 2, Dragon Age Inquisition, Mass Effect Andromeda
Origin: SilverSie
Posts:
 27 Likes: 98
inherit
7070
0
98
SilverSie
lost in andromeda
27
April 2017
silversie
Mass Effect Trilogy, Dragon Age: Origins, Dragon Age 2, Dragon Age Inquisition, Mass Effect Andromeda
SilverSie
|
Post by SilverSie on Apr 23, 2017 14:06:39 GMT
Mini ReShade Shaders TutorialLearning to create your own ReShade presets does, unfortunately (or fortunately for me, because I enjoy doing it), mean spending a lot of time turning different effects on and off and cranking their values up and down to see what they do. Once you've worked out what the key shaders do, though, you'll be able to go to them quickly in the future. A good way of doing it is using someone else's preset and looking at what shaders it uses, and turning individual ones off and on again, to see what changes. Here is my current preset for Elaaden. (You can see some of my Elaaden screenshots in this album on flickr.) Feel free to use it, abuse it, take it apart, put it back together, tweak it, change it, whatever. I've included all the files necessary, so just unzip and drop in your game folder (removing old ones first). Note: Usually we can distribute the binary (dll) and cfg files, but .h or .fx files (the actual shaders) are off limits and must be downloaded from their authors or ReShade's website/github/during installation. Since 2.0.3 isn't widely available anymore I've just put everything together here. I don't recommend doing that and abusing the shader creators' good will, but I got permission for one of my TS4 presets and I'm cheekily extending it here because I'm a terrible person. There's a link on the first page of this thread and at the bottom of this post to the repository of old versions. If you're sharing your presets I recommend linking users to that repository to download the files they need, and just including the cfg files from your preset to paste over the top.
A lot of presets tend to use some of the same shaders over and over. You don't have to use all at once, some do similar things but in different ways, but you can use them all together if you want to slowly build up just the right look. The more shaders you turn on, the higher the overhead on your PC's performance. Some common shaders, which are all found in CeeJay's cfg file if using 2.0.x: - Levels
- Curves
- HDR
- LiftGammaGain
- Tonemapping
- Vibrance
- SMAA
- Lumasharpen
The above shaders were once included in SweetFX, and they do a lot of the heavy lifting for most presets. They are by no means mandatory to use, but they are each very useful. Levels: does what you expect it to do - you can adjust what ReShade treats as the white and black point. Curves: similar results to levels but with less control, but at the same time can be used to curve colours as well as light. Has several curve algorithms to choose from. HDR: affects colours and light, this is your brightness and contrast in one. Can be fiddly to get both values working together, but it's great once you do. This is the only value I'm generally tweaking for brightness on a shot-by-shot basis with my current preset. LiftGammaGain: very powerful colour and contrast tool, allowing you to change the gamma of RGB channels independently for shadows, midtones, and highlights. I do a lot of my initial colour tweaks with this shader, and then often come back and tweak it for finer changes once I've done other things. Tonemapping: contains several effects - gamma, exposure, saturation, bleach, and defog. Defog is another colour correction tool - the others do what you'd expect. Vibrance: does what it says on the tin. Can be fiddly with negative values. Can be used for colour correction as well as just general vibrance. SMAA: this is anti-aliasing, probably the best post-process anti-aliasing you can get. Better than FXAA (which is in most games). PP AA applies to the image after it is rendered, which often means it blurs the image and can't distinguish between different types of edges. SMAA keeps blurring to an absolute minimum, and is capable of really quite powerful AA. You could probably ditch ME:A's own AA and replace it with this for a more lightweight alternative without seeing a really huge loss in quality, especially if you're hotsampling - which will remove jaggies on its own. Lumasharpen: sharpens the image, but will introduce more aliasing the higher you go. Avoid over-sharpening, it rarely looks good. Elsewhere in ReShade, a really great colour correction shader is HSV. It's not included in 3.0.x (I found a randomly ported version in a thread somewhere on the ReShade forum, but it hasn't made it in officially yet.) In 2.0.x you can find it in MartyMcFly's cfg file. I'm not using this in my ME:A presets currently, but I've used it extensively in my TS4 presets. Bloom is always fun to play with, although it can be tricky to get under control. It can be used for light and/or for colour correction. There are a couple of different bloom shaders. The one I generally use is just called Bloom inside Ganossa's cfg in 2.0.x. Ioxa's Gaussian Bloom is very powerful as well, and works noticeably differently to Ganossa's. There is a very basic bloom shader inside CeeJay's cfg (the old SweetFX bloom), but I don't use that because of its lack of controls. Ambient Light (Ganossa) can be a lot of fun. It has its own adaptation controls (which might help mitigate some of ME:A's truly ridiculous adaptation - I haven't experimented), but is also another type of bloom in some ways. It can be quite heavy-handed, and it's a very slow shader to load, but can be nice situationally and add a lot of atmosphere. Ambient Occlusion shaders will give you more options for shadowing, which can produce some really nice effects. In my current presets I'm using SSGI solely for its GI (global illumination), since I use HBAO Full in-game and haven't really felt the need for further AO. Most common to use in other games is SSAO, which is relatively lightweight (compared to HBAO for example) and has a good range of options. 3.0.x has MXAO, which is another great option (but won't work properly in ME:A). Depth of Field has several shaders which offer different options. The best imo are Matso (what I used for the funky effects above) and ADOF/Marty McFly's. I have ADOF set up to mimic the bokeh shapes in ME:A, so I can use it as a substitute on the Tempest, where the Cinematic Tools' DoF doesn't work. Both Ambient Occlusion and Depth of Field require a game to have access to the depth buffer. Not all games allow ReShade this access. ME:A does, but only when using 1.x.x and 2.0.x. 3.0.x sort of works but doesn't - it's very buggy. ME:A has a reversed depth buffer, which you need to tell ReShade about. 2.0.x makes it easy with a setting in Global.cfg. One shader you might find ridiculously useful is LUT. There are two versions of this. I recommend using the one under Ganossa's cfg, under the Tuning Palette options. In case you haven't worked with LUTs before, LUT stands for Look-Up Table, and is used a great deal in cinematography to colour grade. The way it works in ReShade is you can take a bunch of vanilla screenshots of the game, and take them into Photoshop or similar and edit them using layers until you have something you like and that works across all situations. Then you open a neutral LUT and apply the same settings to it and save. Then point ReShade to that LUT, and it will effectively give your whole game the same settings you applied in Photoshop. Things like vignettes and grain and any selective area touch-ups won't work - this is all about colours and contrast that apply to the image as a whole. Here is a tutorial I made for TS4 players: From Photoshop to ReShade. I keep meaning to do this for ME:A, but have been too lazy to take all those vanilla screenshots ^^
Tip: You can use negative values with most things, and you can use values outside of the range that is specified in the instructions for most as well. Some of the best effects can be had by playing around with numbers you wouldn't expect. I almost always use Levels with numbers outside their specified ranges. Using negative values for Bloom's RGB controls turns it into CMY controls as you'd probably expect. Tip: even if you don't use SRWE, if you're adjusting a ReShade preset set the game to windowed mode. That way when you tab out you can still see the game running behind Notepad++ (or whatever you use), and as soon as you save your changes the game will update. You don't need to tab back in to see the changes, you can see them behind Notepad++.
VersionsMost previous versions of ReShade are available here in a user-maintained repository. This repository has already changed locations at least once, and there is no guarantee these will be available in the future, so I recommend downloading all the versions you might need and storing them somewhere safe for future use. The most up-to-date version of ReShade is always available to download from the ReShade homepage, and by following links on there you can find the github project. ReShade the tool is now open-source. Individual shaders are created, maintained and owned by their respective authors. 3.0.x comes with its own in-game GUI for editing shaders. Some find this easier to deal with, although it's not the best designed GUI out there and comes with its own frustrations. The file structure is entirely different in 3.0.x, and using the GUI seems to be the easiest way to edit rather than using Notepad++. Installation of 3.0.x is easy enough, although collecting together all the shaders you want to use with it can be awkward since there are quite a few useful and interesting ones not yet included on github, but scattered around the ReShade forum and elsewhere. Some shaders that lots of people enjoyed from earlier versions haven't been ported to 3.0.x as of yet. 2.0.x is probably best installed manually to avoid any frustrations with the assistant, but that's down to personal preference. The assistant can be used for editing, but most people I've seen don't find it an enjoyable experience. The best way to edit shaders is with Notepad++ or similar. (I recommend Notepad++ because it numbers lines, groups elements together with visual cues, and you can click next to a line to add a blue circle to the line to make it easy to find when you scroll down again later. Notepad++ is free.) Editing manually in this way also gives you greater control over the value increments, and lets you easily go outside of the specified range (which is where the magic happens). It might be daunting at first, but quite a few preset makers still prefer this way of editing. Of course, it's personal preference. Use whatever makes sense to you. 1.1.0 is still widely used by many. It doesn't quite have the functionality of 2.0.x, but is still fairly robust. Instead of the assistant, there is the mediator. Again, opinions vary on whether it's a good tool or not. Manual installation is still probably the best way to go, with manual editing of shaders via Notepad++, but that's up to you. I still use 2.0.3 frequently, although tend to use 3.0.x with new games (unless it doesn't work as well, like in ME:A). The only way to decide which you prefer is to spend a good deal of time with each of them. There are no shortcuts to using ReShade if you want to create your own presets, but it's not nearly as complicated and complex as it can appear when you're starting out. Basically, if you have a keyboard with the keys 0-9 and can type those numbers you can create your own ReShade presets. Thank you for this!!! I'd love to attempt my own LUTs and I remember seeing your TS4 tutorial. My favorite ENBs in Skyrim + FO4 use LUTs. That's some amazing stuff. I think I'll also attempt replacing the game's AA with SMAA and see how it behaves. |
|
ashoken
N2
  "I didn't come here to be a goddamn outsider!"
 Games: Mass Effect Trilogy, Dragon Age: Origins, Dragon Age 2, Dragon Age Inquisition, KOTOR, Baldur's Gate, Neverwinter Nights, Jade Empire, Mass Effect Andromeda
Posts:
 160 Likes: 795
inherit
1149
0
795
ashoken
"I didn't come here to be a goddamn outsider!"
160
Aug 23, 2016 12:14:38 GMT
August 2016
ashoken
Mass Effect Trilogy, Dragon Age: Origins, Dragon Age 2, Dragon Age Inquisition, KOTOR, Baldur's Gate, Neverwinter Nights, Jade Empire, Mass Effect Andromeda
|
Post by ashoken on Apr 23, 2017 17:01:28 GMT
Getting more familiar with the tools. This is the first game I've gotten ReShade to really work.  |
|
amoebae
N3
   previously: catabuca
Posts: 932 Likes: 3,579
inherit
2526
0
3,579
amoebae
previously: catabuca
932
January 2017
amoebae
|
Post by amoebae on Apr 24, 2017 5:44:38 GMT
|
|
amoebae
N3
   previously: catabuca
Posts: 932 Likes: 3,579
inherit
2526
0
3,579
amoebae
previously: catabuca
932
January 2017
amoebae
|
Post by amoebae on Apr 24, 2017 5:46:22 GMT
|
|
inherit
6963
0
Aug 24, 2017 18:28:15 GMT
65
bossuary
32
April 2017
bossuary
|
Post by bossuary on Apr 24, 2017 16:01:07 GMT
those are gorgeous. elaaden has to be the prettiest location.  meanwhile, i'm sort of dying to fiddle with just a few looks, but i can't get 3.0's gui to load up the shaders. i even went to settings and typed out the file paths for shaders and textures, hit Reload. nothing. SIGH. i should have stuck with ReShade 1.0 or 2. |
|
amoebae
N3
   previously: catabuca
Posts: 932 Likes: 3,579
inherit
2526
0
3,579
amoebae
previously: catabuca
932
January 2017
amoebae
|
Post by amoebae on Apr 24, 2017 17:10:51 GMT
those are gorgeous. elaaden has to be the prettiest location.  meanwhile, i'm sort of dying to fiddle with just a few looks, but i can't get 3.0's gui to load up the shaders. i even went to settings and typed out the file paths for shaders and textures, hit Reload. nothing. SIGH. i should have stuck with ReShade 1.0 or 2. Are you the person who asked me about something similar on tumblr yesterday? What's happening when you open the GUI? Have you followed the tutorial to completion? In what way isn't it loading the shaders? Is the GUI empty of effects altogether? That happened to me once and I can't remember exactly why but it had something to do with me either not completing the tutorial properly or shifting shaders around manually so they weren't where they were meant to be. I wish I could remember so I could give more advice but it was a while ago and I solved it pretty quickly so I didn't think too much about it. |
|
inherit
6963
0
Aug 24, 2017 18:28:15 GMT
65
bossuary
32
April 2017
bossuary
|
Post by bossuary on Apr 24, 2017 19:33:54 GMT
those are gorgeous. elaaden has to be the prettiest location.  meanwhile, i'm sort of dying to fiddle with just a few looks, but i can't get 3.0's gui to load up the shaders. i even went to settings and typed out the file paths for shaders and textures, hit Reload. nothing. SIGH. i should have stuck with ReShade 1.0 or 2. Are you the person who asked me about something similar on tumblr yesterday? What's happening when you open the GUI? Have you followed the tutorial to completion? In what way isn't it loading the shaders? Is the GUI empty of effects altogether? That happened to me once and I can't remember exactly why but it had something to do with me either not completing the tutorial properly or shifting shaders around manually so they weren't where they were meant to be. I wish I could remember so I could give more advice but it was a while ago and I solved it pretty quickly so I didn't think too much about it. nope, wasn't me! but, yeah, during and after the tutorial the GUI is completely empty where there should be shaders. which is why i went to the forums for troubleshooting and found the bit about specifying the file path in Settings. but i haven't moved anything or touched anything, other than to rename the .dll (otherwise it wouldn't show up at all). |
|


